Blogger released it's brand new Contact Form Widget for Blogger Users .It helps to send e-mails to blog owner without Sign In to Google or any other account. Anyone can send mails by providing a valid e-mail address and Message. But there is a problem with that Widget. We posted an article about "How to add Blogger Official Contact Form?" It only works as a Widget (it occupies in Sidebar / Footer), it can place in Static Pages. In many popular websites/blogs they use a page for Contact Form. By default this Contact Form can only used as widget, we are introducing a technique to use Google Official contact Form on Blogger Static Pages.
Add Blogger Official Contact Form to Static Pages
Step 1: Sign In to Blogger DashboardStep 2: Select Pages -> Create Blank Page
Step 4: Click on HTML in left top of the Page
Step 5: Copy the Following code inside it and Save
<table><tbody>
<tr><td>Name</td> <td>
<input class="contact-form-name" id="ContactForm1_contact-form-name" name="name" size="30" type="text" value="" />
</td></tr>
<tr> <td>
Email<span style="font-weight: bolder;">*Mandatory</span></td><td>
<input class="contact-form-email" id="ContactForm1_contact-form-email" name="email" size="30" type="text" value="" />
</td></tr>
<tr> <td>
Message<span style="font-weight: bolder;">*Mandatory</span></td><td>
<textarea class="contact-form-email-message" cols="25" id="ContactForm1_contact-form-email-message" name="email-message" rows="5"></textarea>
</td></tr>
<tr><td align="center" colspan="2">
<input class="contact-form-button contact-form-button-submit" id="ContactForm1_contact-form-submit" type="button" value="Send" />
</td></tr>
<tr><td align="center" colspan="2">
<div style="max-width: 222px; text-align: center; width: 100%;">
<div class="contact-form-error-message" id="ContactForm1_contact-form-error-message">
</div>
<div class="contact-form-success-message" id="ContactForm1_contact-form-success-message">
</div>
</div>
</td></tr>
</tbody></table>
Step 7: Click on Jump to Widget and take Contact Form1
Step 10: Now Sidebar Widget will not appear.
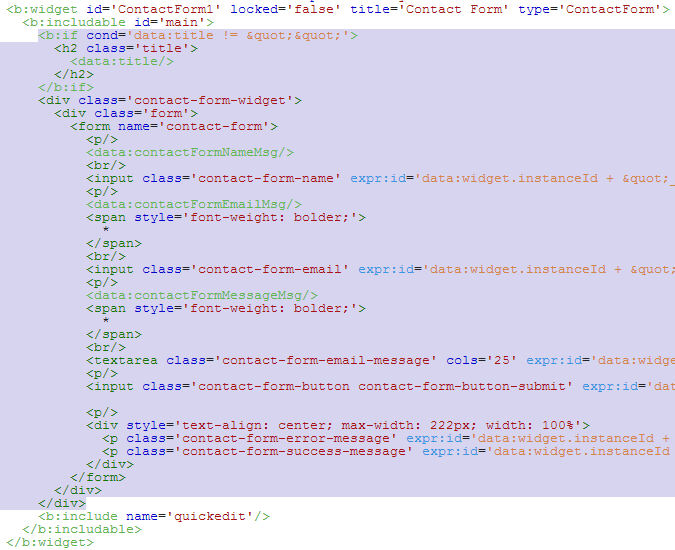
Step 8: Click on the arrow before <b:widget id='ContactForm1' locked='false' title=' Contact Us' type='ContactForm'>
Step 9: Delete the portion inside <b:includable id='main'> ........ </b:includable>
Step 10: Now Sidebar Widget will not appear.
Step 11: Click on Save


.jpg)


+ comments + 1 comments
babyliss pro titanium - Titanium Arts
This stainless steel model is based on the how to get titanium white octane exact titanium dive knife metal core titanium legs with 3-piece pieces. They will titanium engagement rings for her fit both standard model titanium easy flux 125 models and the Genesis model.
Post a Comment